


View a Class Roster
The Class Roster, available in your Faculty Center in MyDelta, is where you will go to manage your class enrollment, find details about the students enrolled in your class, and communicate directly with your students.
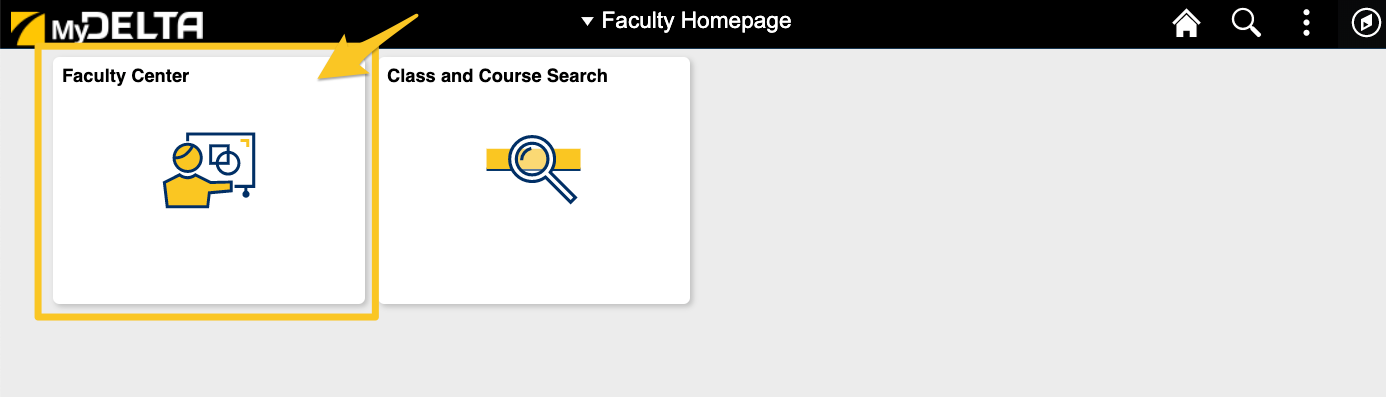
- Login to MyDelta and click on the Faculty Center icon.
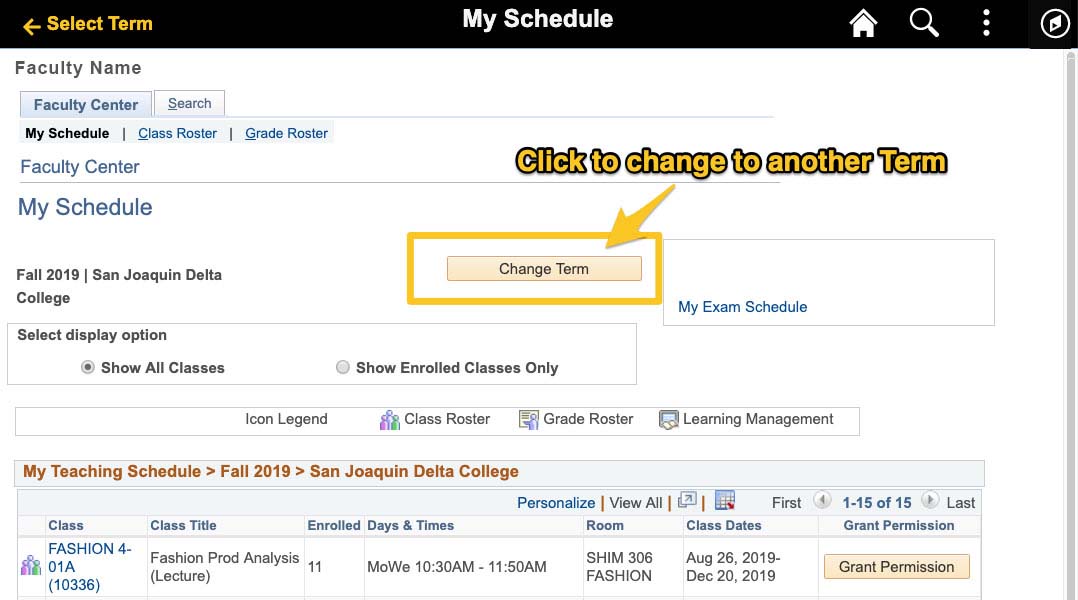
A new page will load with your Teaching Schedule. (Note: defaults to the last semester viewed. In order to look at your schedule of a different term, click the Change Term button to select a term from a list of all terms)
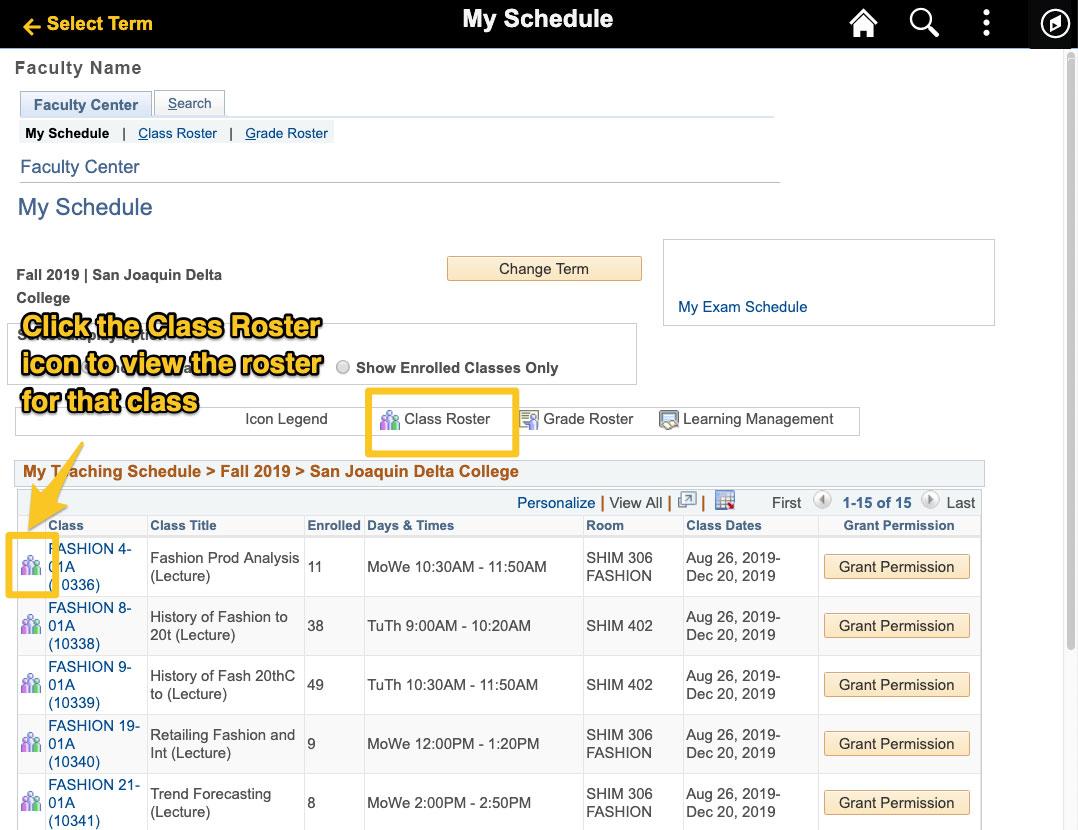
If the class you are teaching has enrollment, the Class Roster icon will appear to its left in the schedule. Click on the icon to load a new page with a list of students enrolled in the class.
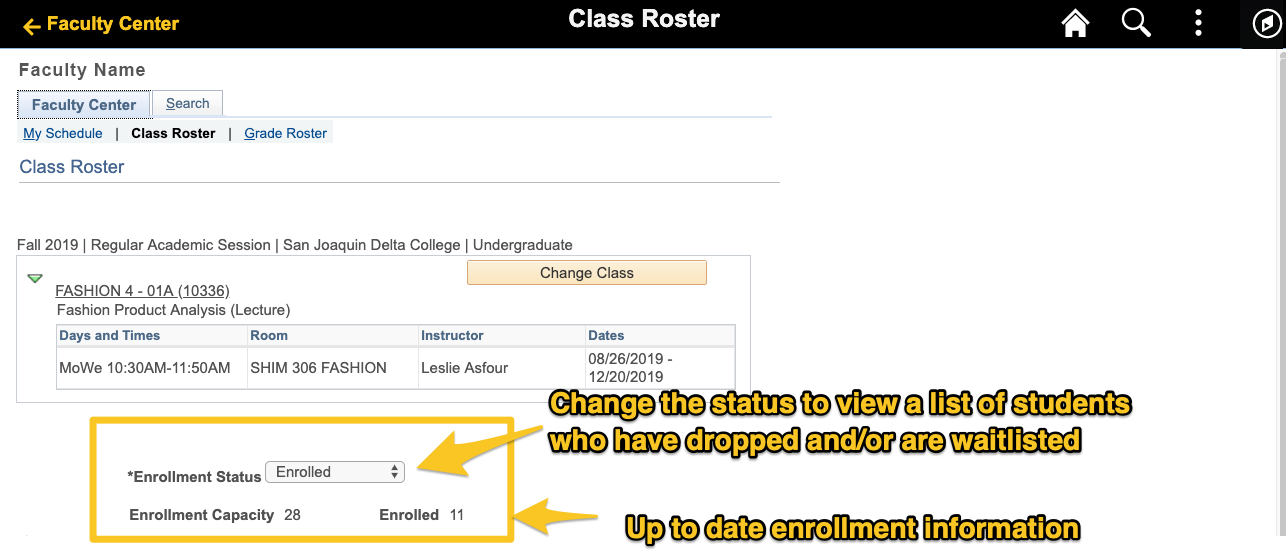
When the Class Roster loads, it will display the capacity of the class in the Enrollment Capacity field, as well as the total number of enrolled students in the Enrolled field.
The default view for the class roster is Enrolled. You can use the Enrollment Status dropdown to view students who have dropped the course and/or who are waitlisted.
Each class roster contains the following information on the students:
- Photo ID is not working as the system doesn’t have any student photos stored in the system.
- ID is the campus solutions number for the student.
- Name: Student’s Name
- Phone Number: Shows you the phone that students have opted into receiving text messages.
- Grade basis: Shows you what Grade system should be used for that student in your class. Options are Graded, Pass No Pass, Credit no Credit, Audit, Not graded.
- Units is the number of attempted units the student is enrolled in for that class. If you have a variable credit class this value may be different for some of the students.
- Program & Plan: The academic program to which the student has selected as their major
- Add Date: The date the student enrolled in the class
- Date of Drop Transaction: Shows the day a drop was created (different than a last day of attendance)
- Course History: Click to display information about the courses that the student has taken and/or is in progress of taking at Delta College
- Status: Student’s current enrollment status (i.e. Dropped. Waitlisted or Enrolled). Note this is only available when you have selected All from the Enrollment Dropdown.
- No Show: Allows you to drop a student for no enrollment at the beginning of the term. The system will backdate to add date.
- Drop Exc Abs.: Provides you with a link to indicate the last date a student attended and then process a drop.
- Last Dt. Attended: Shows the date that was used when a drop was processed for excessive absences.
- Reinstate: Is for students who are in a status of dropped, this will add the students back into the class as of the first day they added the class.
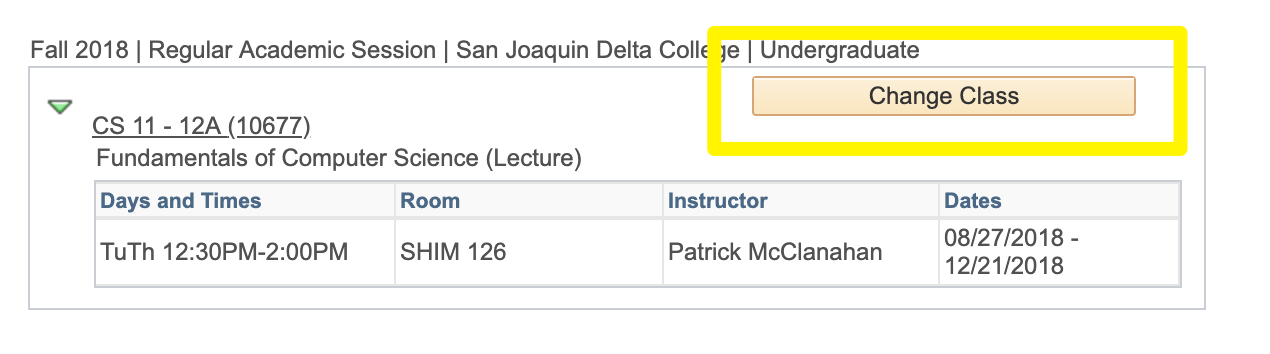
While viewing the class roster, if you wish to look at a different class, click the Change Class button to be returned to the My Schedule page and select another roster following step 4 above.
Class Roster Management
The Class Roster is where you will go in MyDelta to manage your class enrollment, both before and during a term. Use the guides below to help you complete various functions for Roster Management,
View historical Class Rosters
The first button in the My Schedule Page allows you to go view historical and future terms. Use this link to change the term view of the classes you wish to see information for.