


Your Shopping Cart in MyDelta
Overview of How to Use the Shopping Cart
The shopping cart allows you to select classes before your assigned registration date and time so that you are ready to register once your registration appointment arrives.
Add Classes to Your Shopping Cart
You can add classes to your Shopping Cart from Class Search and Enroll or from your Planner.
Once you’ve chosen the class you want to add to your Shopping Cart, follow the steps below to add the class to your cart.
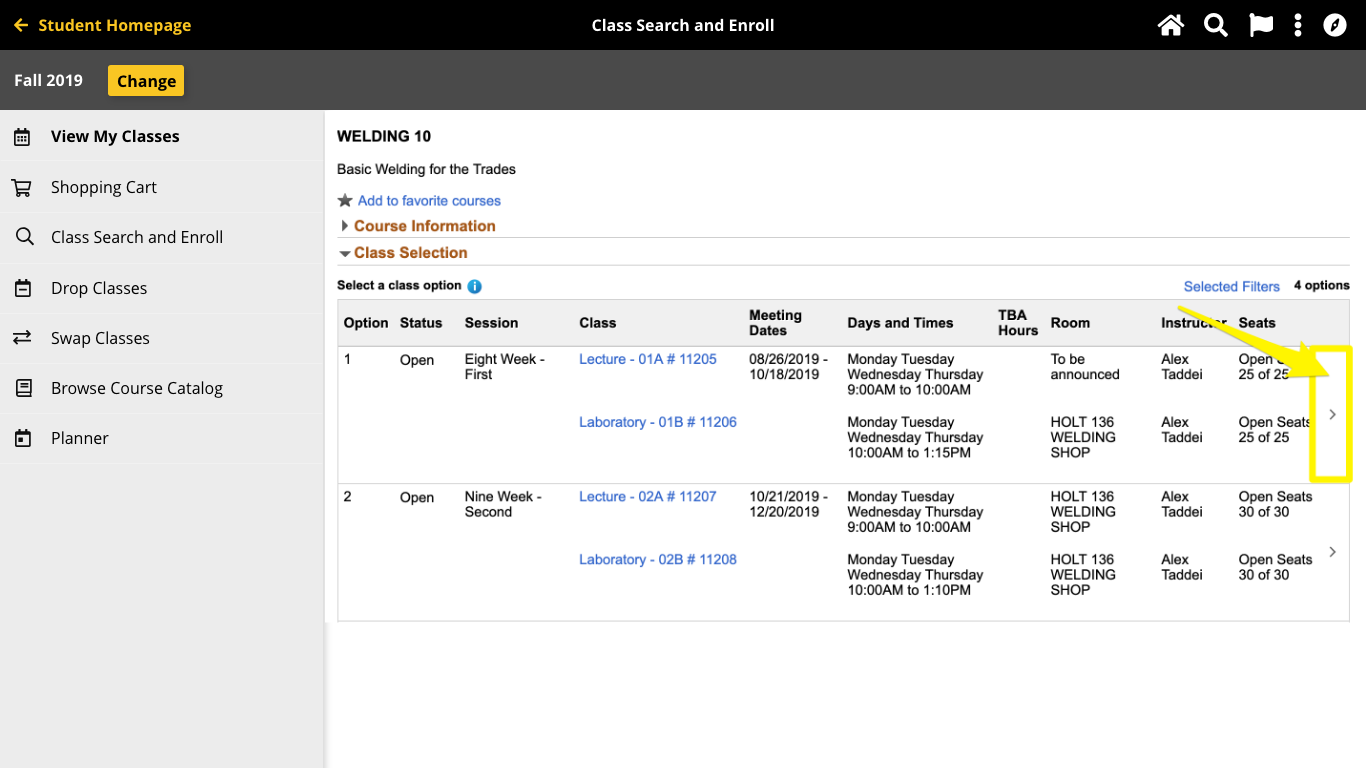
- Look for the arrow pointing right on the far right of the row of the class. If there is no arrow, enrollment for the term may not be open or you may be ineligible to add the course. If there is an arrow, click anywhere on the row of that class to start the process of adding the class to your shopping cart.
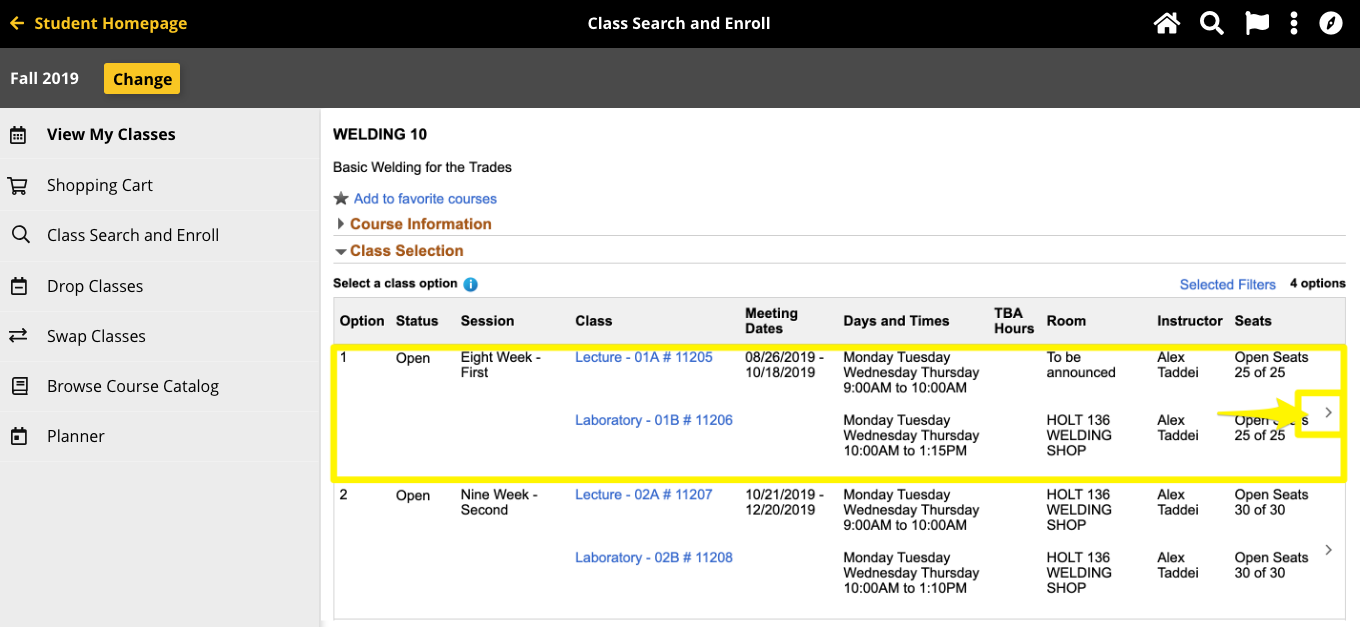
- First, review the class to confirm this is the class in which you would like to add to the Shopping Cart. Once confirmed, click Next.
- In Step 2, you will Review Class Preferences. If the course is full, here’s where you can request to be added to the waitlist. Choose Yes or No, and then click Accept to continue.
- Next, on the Enroll or Add to Cart page, select Add to Shopping Cart and click the next button.
- Lastly, review and submit. If the class displayed is correct and all preferences are set correctly, click the Submit button and then choose yes to confirm adding the class to your shopping cart.
- The confirmation page will appear and let you know you the class has been added to your shopping cart. You can continue to repeat this process, adding all the classes you plan to take in the upcoming term to your cart.
Validate Your Shopping Cart
Validating your shopping cart helps make sure the classes you have selected can be added to your schedule on your registration date.
- Log in to MyDelta
- From your MyDelta homepage, click the Manage Classes icon.
- Click on Shopping Cart from the left sidebar menu.
- Listed will be all classes that have been added to your cart. If you have not added any classes to your cart, you must do so before you can validate your cart.
- Click the checkbox to the left of the classes to select them to be validated.
- Click the “Validate” button to see whether or not you will be able to successfully register for all of the classes in your cart.
- A confirmation page will appear that states whether or not you will be able to register in each class.
- If there are any errors such as time conflicts or you do not meet a prerequisite, you should:
- Return to your shopping cart and delete the course from your cart
- Search for new classes to take
- If there are no errors, you will receive a message that each class can be added to your schedule when it’s your date to register!
Register from Your Shopping Cart
The shopping cart allows you to select classes before your enrollment appointment time so that you are ready to enroll when it is time.
- Log in to MyDelta
- From your MyDelta homepage, click the Manage Classes icon.
- Click on Shopping Cart from the left sidebar menu.
- Click the checkbox to the left of the classes you want to register in (you can select all or just some.)
- Click the Enroll button.
- Confirm enrollment by clicking Yes.
A message will appear for each course indicating the class has been added to your schedule or will state the reason you are unable to enroll in the class.
Once you’ve registered, go to View My Classes to see the classes you have registered for. Or, go to Class Search and Enroll to find additional classes to enroll in.